It’s never a good sign for your blog that posting counts as a New Year’s resolution. Since Thanksgiving, I skipped big family gatherings because of COVID, but eschewing holidays has done wonders for productivity.
I’ve been teaching myself a 3D sculpting program called Zbrush. It’s the gold standard for hi-res modeling for games and movies. Zbrush’s interface is a bit wonky, but it makes magic. Not many graphic designers do 3D layouts, so I feel a little bit of a vanguard in this respect. It’s either that, or everyone is doing it, and I’m simply too out of touch to know any better.
After investing nearly five months into abandoned cover designs, the prospect of beginning another was daunting, but iteration is the formula for success.
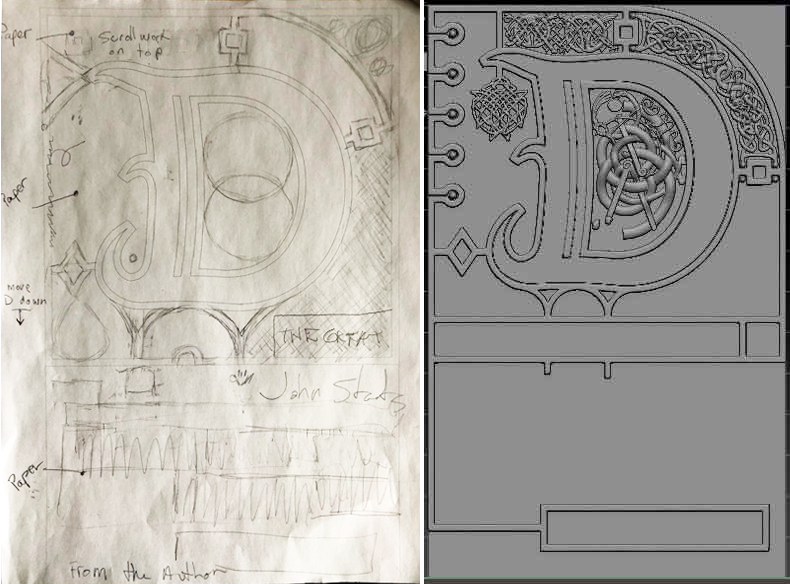
I began by making a giant letter D in Adobe Illustrator. After a day or so, I framed the space around it with separate panels, making sure I had enough room for the title and author. I formated the layout for traditional books and Audible.com’s square thumbnail. All seven novels will share the same design with distinct color schemes.
Below is my first comprehensive sketch and an early screenshot of my 3D layout in Zbrush.
For the hundredth time, I studied The Book of Kells, making dozens of notes and tracing patterns to make sense of the scrollwork. I wanted to create a proper tribute, and that would involve more than scribbling lines of tangled spaghetti. I needed to understand the method to its madness.
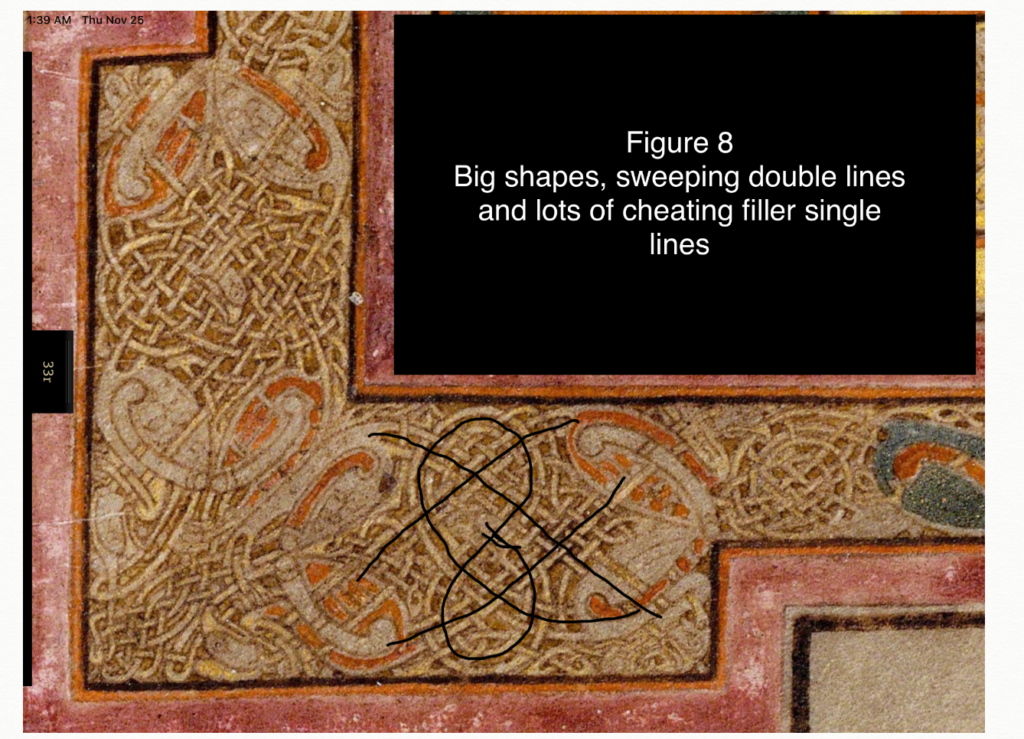
Scholars believe The Book of Kells was the work of 3-4 monks which hasn’t been replicated in 1500 years. The lack of replication is partly because The Book of Kells is so abstract that the page is confusing and unreadable. For these same reasons, my first covers fell short. Still, I believed I could reverse engineer the style to capture its beauty.
I learned through my previous covers that Celtic scrollwork can become too messy. I want it busy, but not overpowering, so I identified three weaknesses. 1) Celtic designs needed evenly spaced lines, or it looks messy. 2) Many of these lines needed to form simple geometric shapes. 3) Lastly, I needed to resist the urge to zoom in on the computer and work on a scale smaller than the human eye could see.
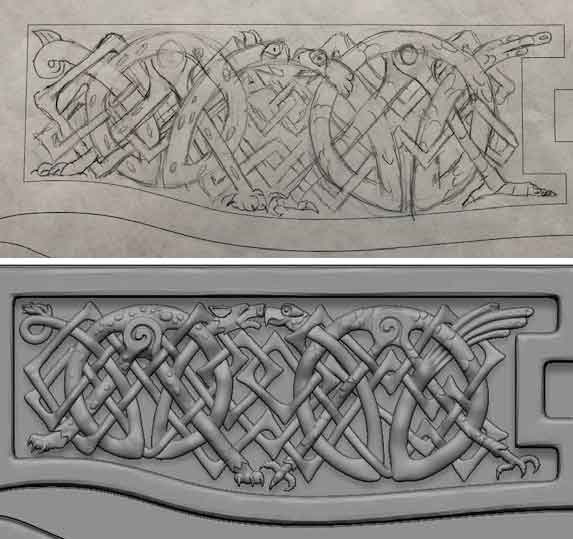
I redid designs in my panels until they looked right. Through trial and error, I discovered a process that produced promising results.
I divided the panels into simple, readable forms before adding details. In the above panel, I mirrored lines along a corner axis to create a dominant pattern (above left), figured out how to shoehorn book elements inside it (above middle), and connected the dominant lines together with smaller details (above right).
After a fortnight of sketching, I unified my panels in Illustrator and filled in minor details. From there, I took the leap from 2D to 3D. This meant learning how to use Zbrush.
After two weeks of slow death by YouTube tutorials, I acclimated myself to Zbrush’s persnickety workflow and interface. After another week of stumbling around, I finally produced unusable art. Every day, I got faster and learned more about the program’s shortcuts. I enjoy working in Zbrush, and it’s fun to watch the cover come together. Some days, I sculpted for over 12 hours.
These images are screenshots, not renders, so I’m hoping to remove the heavy shadows. It’ll be interesting to see how painting, lighting, and rendering will affect the design. I expect to be done in February, raising my overall investment into the covers to around 8 months. Ouch.
Once the covers are finished, there’s nothing stopping me from releasing my book. I’ll make them available to beta readers on webnovel websites like Royal Road for feedback. I’m also sending out my first three novels to beta readers. If you’re interested in giving me early feedback, please email me at staats.john at gmail dot com.